
Laminate remains a popular flooring choice due to its versatility, durability and cost-effectiveness. It’s also relatively easy to install for confident DIYers who want to save money.
The key to a successful laminate floor installation ultimately boils down to the subfloor and how well it has been prepared prior to laying the boards.
With this in mind, this guide will explain how to lay laminate underlay while highlighting nuances you should be aware of when it comes to the different types of underlay and subfloors. Knee pads at the ready.
In this guide
What you’ll need
Materials
Before you start, make sure you have the materials you need to complete your installation:
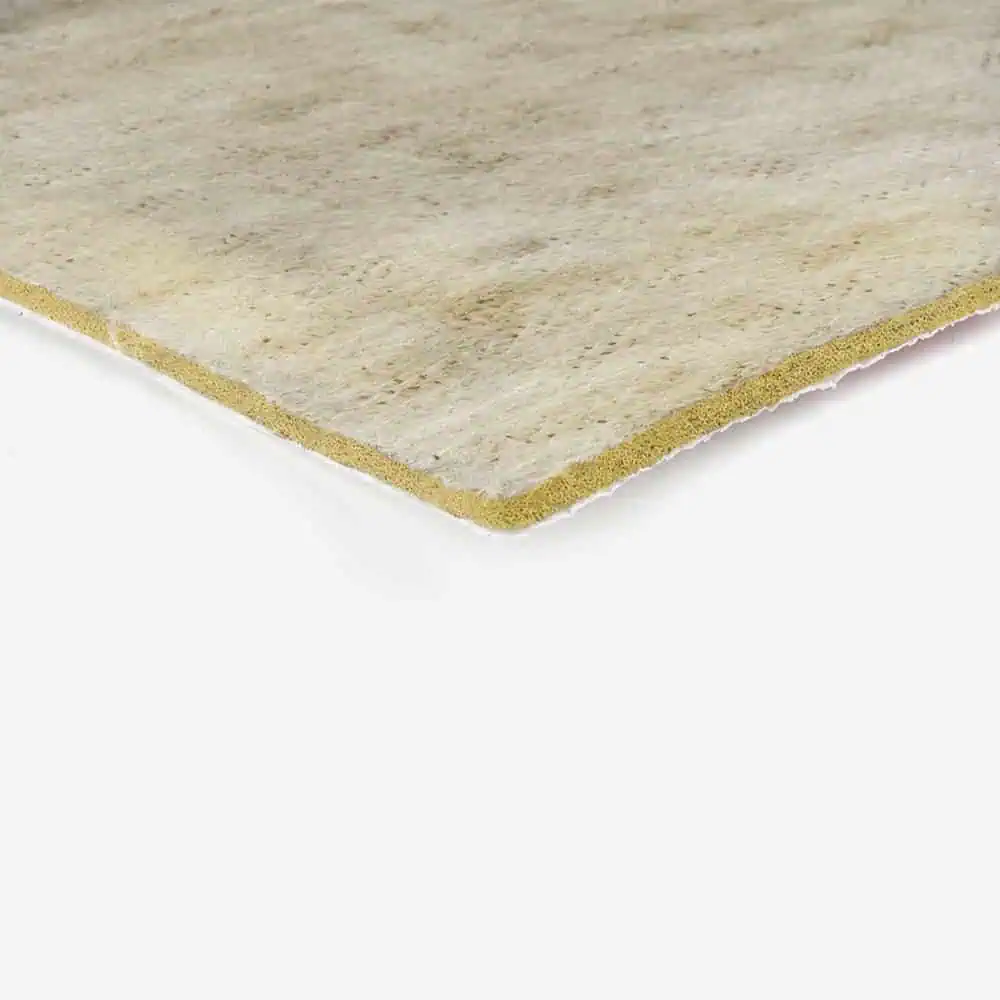
- Laminate underlay: whether you opt for PU foam, sponge rubber or fibreboard, ensure you have enough underlay to cover your space.
- Damp-proof membrane (DPM): sometimes known as a ‘vapour barrier’, you’ll need one of these if you have a concrete subfloor and you’re installing an underlay without an in-built DPM, such as fibreboard.
- Waterproof tape: if a separate DPM is required, you’ll need to tape any joins with waterproof tape to maintain its integrity.
- Underlay joint tape: used to seal any joins between your underlay. It will typically be a foil tape to stop moisture ingress and reduce heat and sound transfer.
- Timber off-cuts or batons: to help repair and fill any gaps in a wooden subfloor, if required.
- Wood adhesive: used in conjunction with timber off-cuts and shims to make good gaps and holes in wooden subfloors.
- Filling compound: for filling small nicks, gaps and holes in the subfloor.
Tools
The tools required will be influenced by your subfloor, but here’s a list of what you may need:
- Working gloves: optional but can reduce nicks and cuts.
- Protective knee pads: again optional but believe us when we say these will make a huge difference to your comfort level and how your body feels after installation.
- Vacuum cleaner: for hoovering up dust, dirt and debris to ensure a clean base to work from.
- Hammer and nail punch: for knocking in proud nails in wooden subfloors.
- Sander, plane or sandpaper: for levelling and smoothing wooden subfloors.
- Utility/Stanley knife: to cut the underlay to size.
- Moisture meter: for measuring moisture levels in concrete subfloors to ensure they are dry enough for laying.
- Metal rule or straight edge (a piece of timber, etc.): for cutting the underlay straight.
Step 1. Remove any existing flooring
First things first: you need to get rid of any existing flooring – whether it’s carpet, laminate, vinyl or tiles – as well as anything used to fix it in place, like gripper rods, adhesive or similar.
Note: it’s not advisable to lay laminate on top of tiled surfaces or old flooring. These surfaces may be uneven and can sometimes trap damp and moisture below your new floor. Instead, you want to start your new project with a bare concrete or wood subfloor.
Step 2. Prepare the subfloor
Concrete, plywood, floorboards… there are multiple types of subfloor you may come across in your home, and understanding how to deal with each one is critical when it comes to installing laminate.
The most common types can be grouped into either wooden or concrete subfloors. Luckily, you can install laminate planks on top of each of them. However, they need to be prepared differently.
Wooden subfloors
Most wood subfloors will be made up of wooden floorboards, which may or may not have plywood or OSB sheets laid on top to create a smooth, flat surface.
Preparing wood subfloors
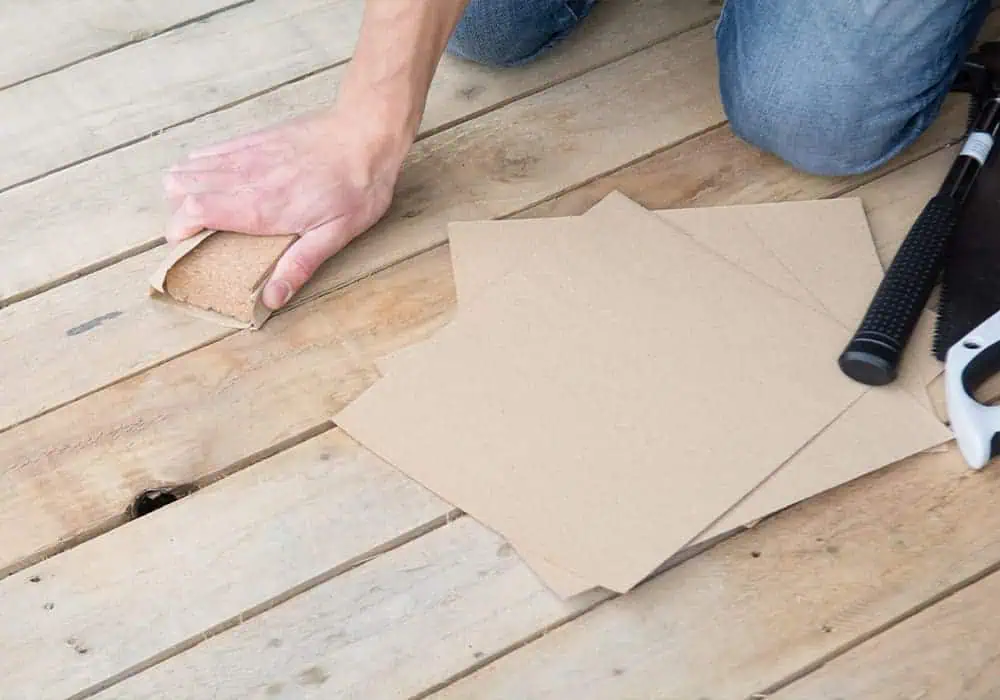
Before installing your underlay, check your subfloor to ensure it’s both stable and level. If there are any loose or squeaky floorboards, screw them in tightly and knock in any raised nails with a hammer and nail punch. If any of the floorboards are rotten, replace them with new.
Check the subfloor for any gaps or holes, and fill them with an appropriate wood filler. Wood shrinks and expands with temperature fluctuations, so treat the holes during the warmest part of the day.
Larger gaps are more challenging to fill, but you can use off-cuts and glue them with wood adhesive. Alternatively, if the budget will stretch, you could choose to lay new sheets of plywood or OSB over the top of the existing floorboards to give you a fresh base to work from.
After filling any gaps, use a sander, plane or sandpaper to even out the subfloor. This will guarantee better underlay installation.
Once you’ve done this, make sure you brush up any loose debris and vacuum your floor so you start with a nice clean surface.
The right underlay for wood subfloors
Wood is a natural material, and it needs to breathe. Therefore, you can use PU foam, sponge rubber or fibreboard underlay on top of wood subfloors. Each of these will provide a level of cushioning and support without completely blocking air circulation.
Concrete subfloors
Concrete is another popular subfloor material that’s used a lot in new-build homes because it’s affordable and durable.
Preparing Concrete Subfloors
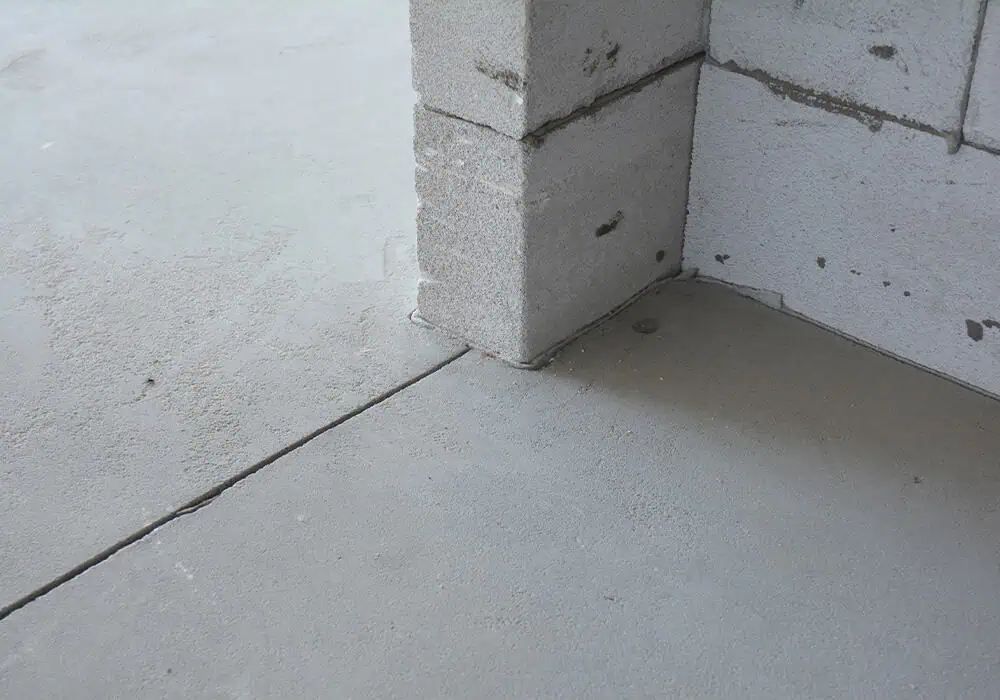
The main issue with concrete subfloors is that they are permeable and prone to moisture. If the subfloor has been recently installed, you need to wait until it fully dries out before even considering laying your new floor.
You should allow a minimum of one day’s drying time for every millimetre (1mm) depth of concrete. For example, a concrete subfloor that is 15mm thick should be left for a minimum of 15 days.
After this timeframe has elapsed, use a moisture meter in a number of places on the subfloor to check that it is fully dry. You need a reading of no more than 2 to 3%.
Once dry, clean and vacuum the subfloor and move on to Step 3.
The right underlay for concrete subfloors
As previously mentioned, damp and moisture accumulation is the biggest issue with concrete subfloors. Therefore, you need a vapour barrier in place to prevent moisture from damaging your laminate flooring.
Conveniently, most modern foam and sponge rubber underlays come with in-built DPMs, negating the need to install a separate layer of plastic.
However, this isn’t the case with fibreboard. If you want to use this type of underlay you will need to fit a DPM underneath.
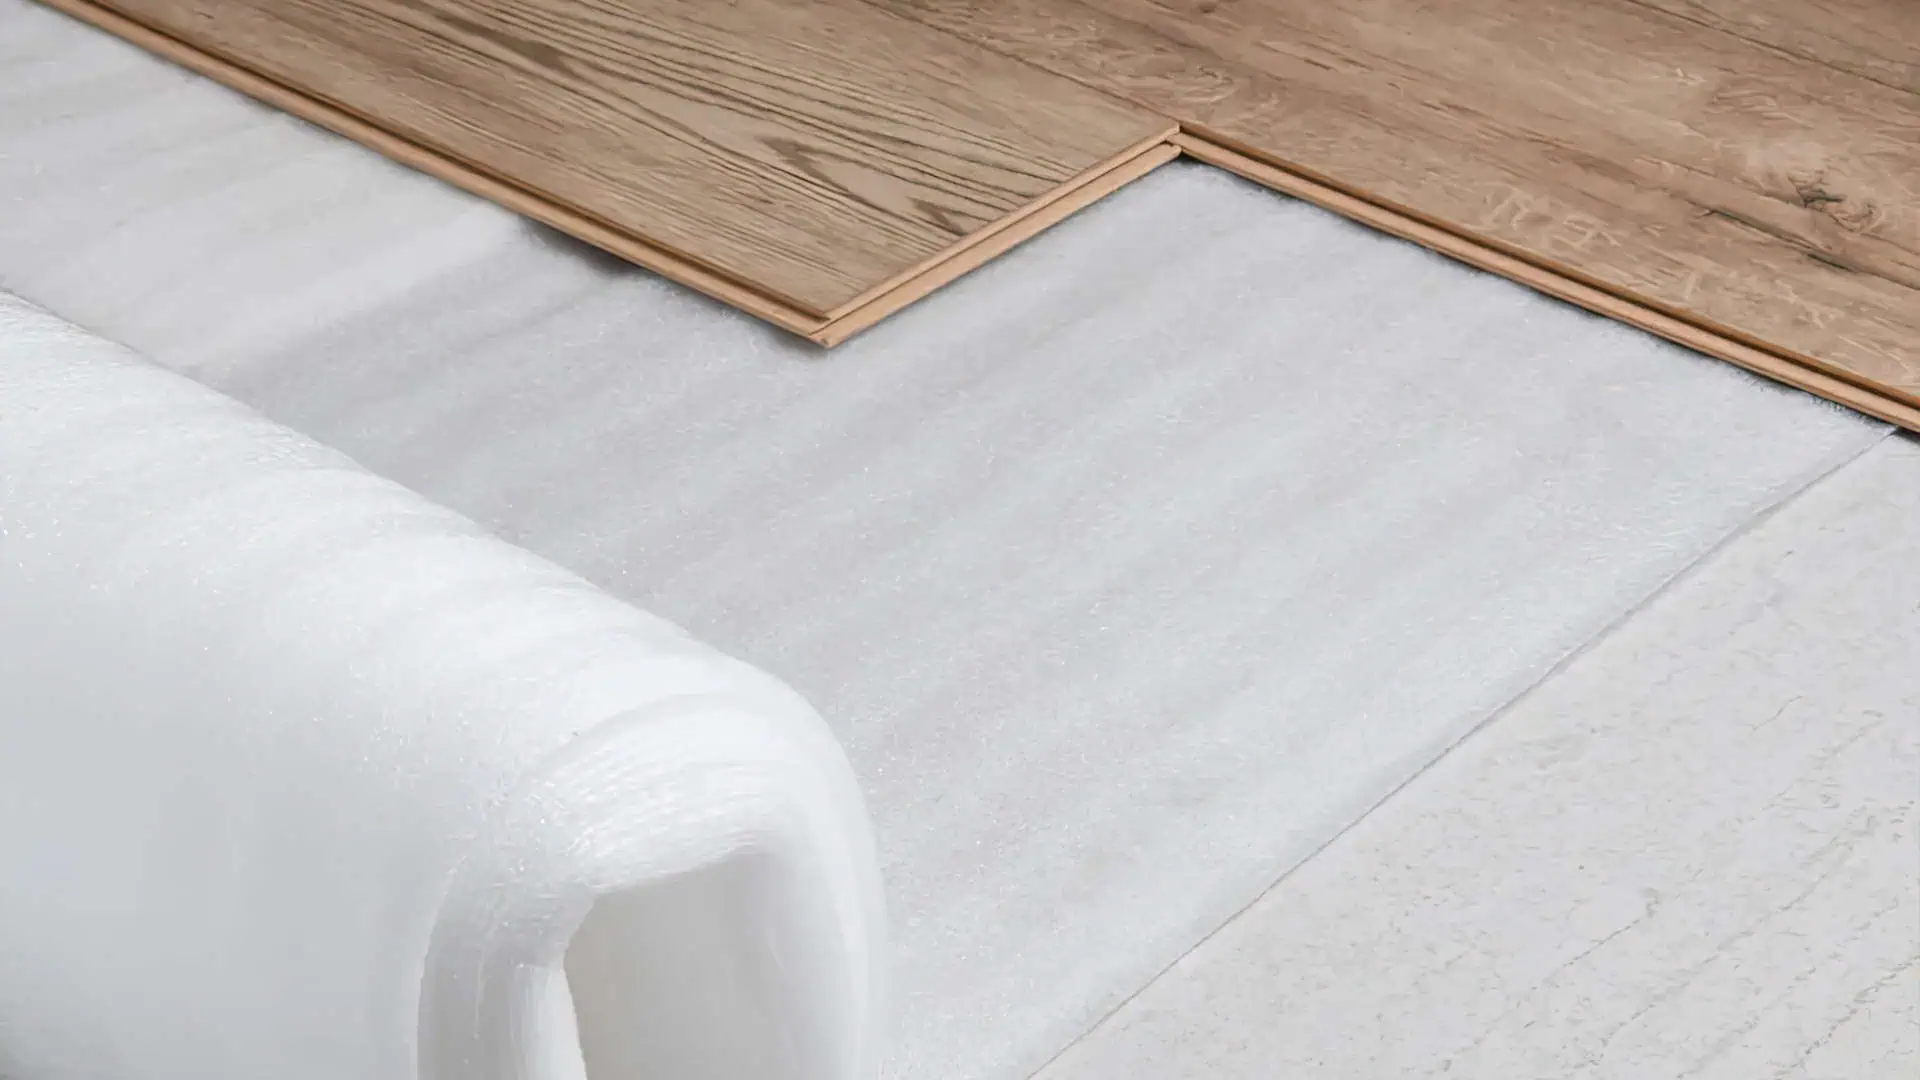
Step 3. Lay the underlay
Once you’ve decided on the right type of underlay to use beneath your laminate flooring, you can start laying it. Here’s how to install the key types of underlay.
Foam/sponge rubber underlay

Foam and sponge rubber underlay usually comes in rolls and will be installed in a similar way to carpet underlay. Here are the key steps:
- Start from the same point where you plan to install the laminate boards.
- Make sure the underlay is the right way up – check the manufacturer guidelines for confirmation. If there is branding on one side of the underlay, this will usually face upwards. If the underlay is foil-backed, then the foil side will usually be installed face down.
- Roll out the underlay in a straight line and when it reaches the opposite end of the room trim it to size using a straight edge and Stanley/utility knife.
- Return to the starting point and roll out another strip of underlay next to the previous strip in the same direction. This should butt up to the previous strip but not overlap it.
- Continue until you’ve covered the entire subfloor with underlay.
- Cut around any radiator pipes and leave a small space (around 100mm) between the pipes and the underlay.
- Tape any joints between the underlay using foil tape.
Fibreboard
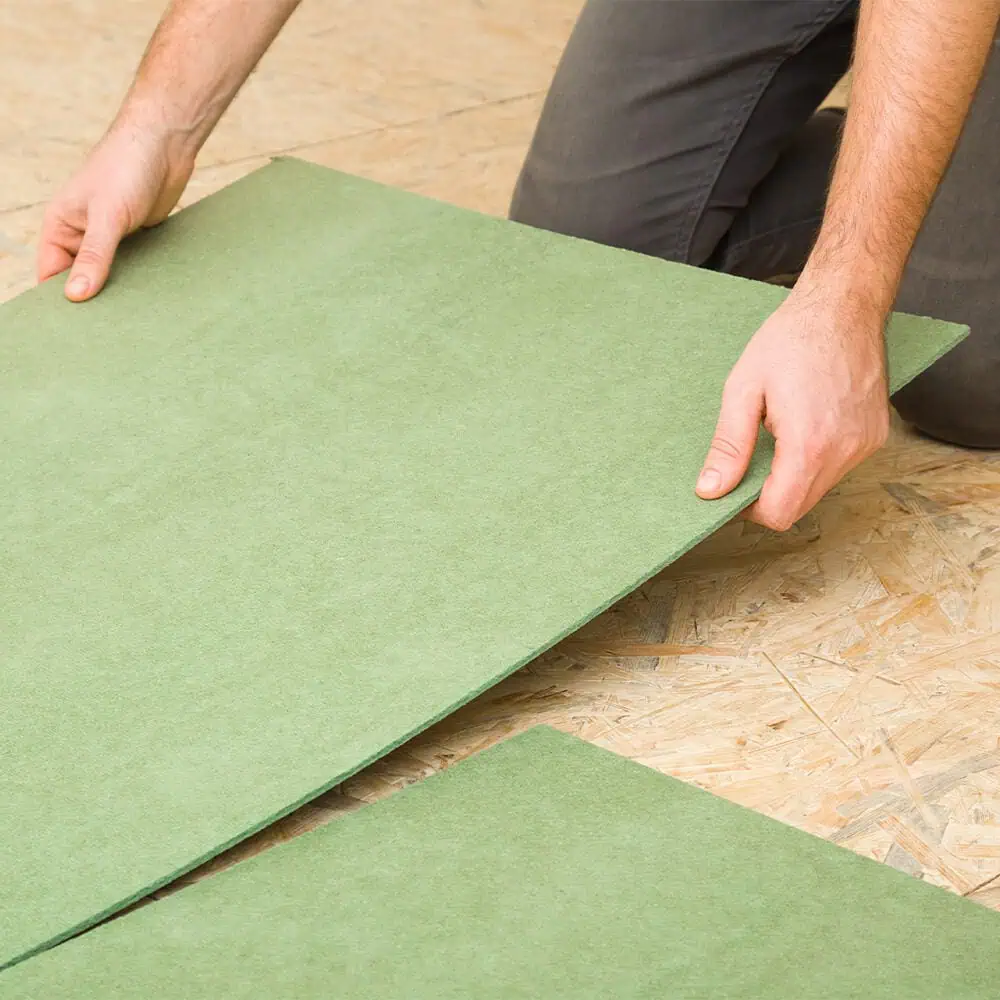
Fibreboard doesn’t have an in-built DPM, so it’s imperative that you install one first:
- Starting from the furthest corner away from the door, lay out the damp-proof membrane.
- If skirting boards aren’t fitted in the room, allow the membrane to run 50mm up the side of the wall. If skirting boards have already been fitted, the damp-proof membrane should run up the wall enough to fill the gap between the subfloor and the bottom of the skirting board.
- If the room is large, use two sheets butted up together and fully tape the joint using waterproof tape.
- Trim any excess after allowing for any required overlap with the walls.
Once you’ve done that, follow these steps to install your fibreboard underlay:
- Let the fibreboard acclimatise in the room for at least 48 hours before installation to reduce the risk of shrinking and expansion.
- Fibreboard should be installed at a 90-degree angle to your flooring, so it would be wise to work out which direction you’ll lay your flooring before you start.
- Start loose laying the fibreboard from the point where you intend to install your laminate planks, leaving a 2mm gap between the sheets and a 10mm gap between the wall/skirting board and the fibreboard.
- Stagger the rows/joints of fibreboards so that they are laid in a brick pattern (known as a ‘running bond’). This will ensure a stronger, more stable base for your laminate.
- In order to create the brick pattern, you’ll need to trim some of the boards. Use a Stanley/utility knife and a straight edge to do this.
- Continue until you’ve covered the entire subfloor.
Need help?
Meticulously preparing your subfloor and laying the correct underlay will ensure you achieve the very best finish to your laminate floor, avoiding costly repair jobs.
If you need help choosing the right laminate underlay for your job, get in touch with our experts at contact@simplyunderlay.co.uk. We will be more than happy to give you advice.